Preparing print-ready artwork for commercial printing can be confusing, especially if it is your first time. To help you out we have created a simple checklist of the most basic requirements for press ready artwork. Please use it as a guide before uploading your artwork {as it may help you save valuable time and avoid any unnecessary printing delays).
Before submitting your artwork, please check that:
- Your artwork is the correct size and is imposed 1 up not as spreads For folded jobs artwork should be supplied at the flat size. E.g., An A3 folded to A4 brochure should be supplied at A3 size {297 x 420mm) and not as A4 sized pages.
- Your artwork contains correctly set up bleed (See below bleed details)
- All fonts are outlined {converted to curves) or embedded.
- All links are embedded.
- Your artwork does not contain any instances of white set to overprint.
- To reduce the possibility of small/thin lines & text breaking up, we recommend all lines are at least 0.3pt wide and where possible text should be at least 8pt using a non-narrow, non-ultralight or non-thin style font.
- To reduce the possibility of uneven borders & strips, we recommend borders and strips in your artwork are at least 5mm wide or 5mm in from the trim edge.
- We recommend images in your artwork are 300dpi when placed at 100%. Please note that increasing the dpi in Photoshop does not increase the resolution of an image.
- Your artwork is the correct size.
- All transparencies are flattened.
Understanding Bleed
If you are supplying press ready artwork you need to understand how to set your bleed up.
This template has been preset with internal and external bleed margins to help you correctly prepare your artwork.
IMPORTANT: You need to carefully follow these instructions when preparing your artwork. Failure to do so may result in artwork incorrectly prepared for print.
When you open up the template file you will be greeted with guides similar to the diagram below:
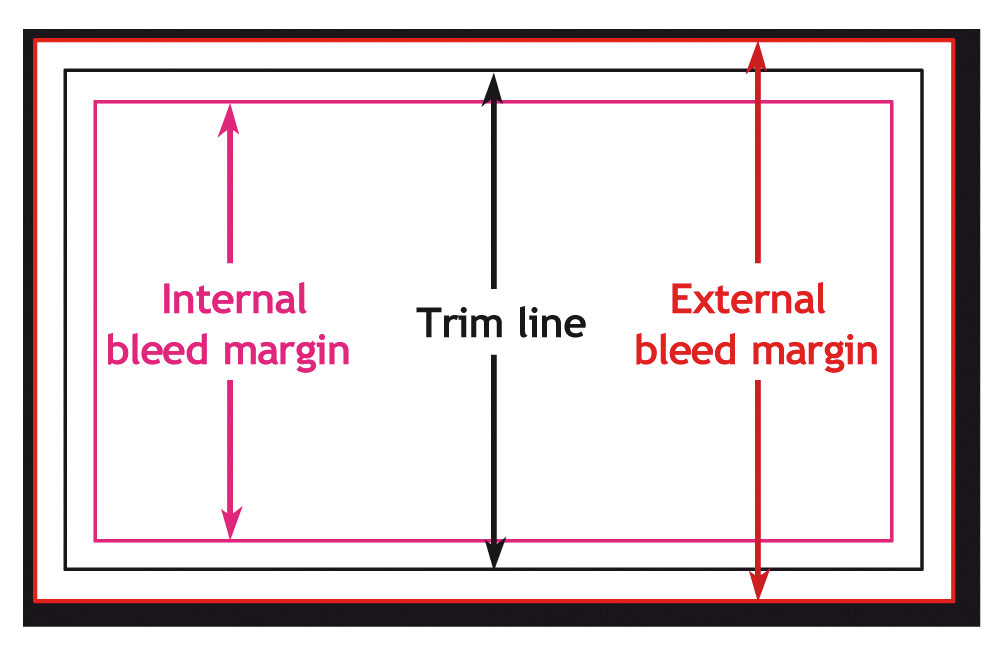
The External line is the external bleed margin. All background images, colours, patterns and artwork elements which extend to the trim edge must also extend to the external bleed margin.
The Middle line is the trim edge. This is the line along which your printing will be trimmed.
The Internal line is the internal bleed margin. All text, logos and important graphics must be kept within the internal bleed margin. Any text or images that extend beyond the internal bleed margin risk being trimmed off during finishing.
Using the PDF Templates
- Place the PDF template into your graphic design program.
- Create your design.
- Ensure you have followed all instructions in the above section titled ‘Understanding Bleed.’
- Ensure all images and fonts are embedded.
- Remove all template guides from your artwork.
- Save your file as a PDF file.
Please carefully check your final file before uploading your artwork.